30 DIY Home Repair and Improvement Ideas
The old adage says, “Home is where the heart is.” It’s true that our homes are the hubs for our family and our lives. Wherever your home may be, it’s important to take good care of it.
Sometimes, home improvements can be costly, and projects end up adding up quickly. When you try to tackle the work yourself, it might save money, but the techniques may be daunting. It can also be challenging to know where to begin.
Start with these DIY home improvement ideas, and you’ll see it’s easy to make repairs without making a dent in your pocketbook!
How to Clean Microfiber With Professional Results
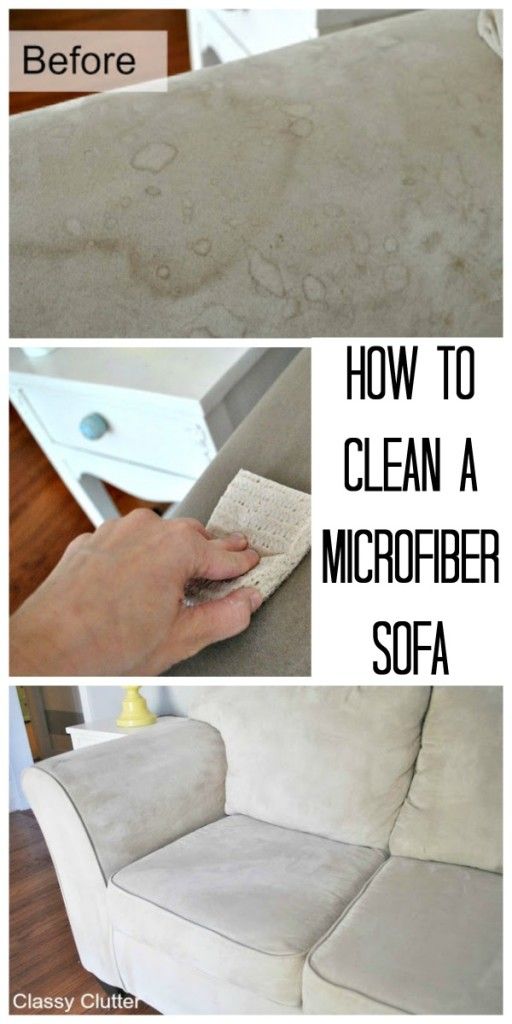
via classyclutter
How to Repair Sling Chairs & Chaises

Fix Cracked and Crumbled Corners Using Spackle Paste
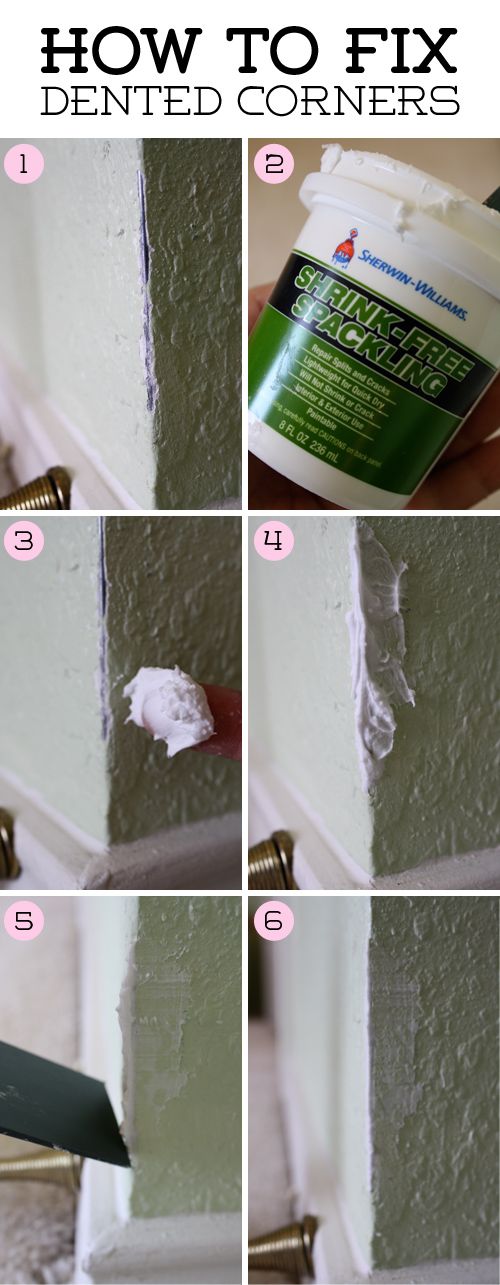
We all have corners that have been damaged. While it’s possible to paint the corners, if the plaster’s been compromised, they’ll no longer be sharp. Instead, apply spackle to the corner. Pull the putty knife from each wall to the corner to make the edge sharp and remove excess spackle. Once dry, paint, and it will look like new! via behindthestudio.
How to Repair Holes in Drywall
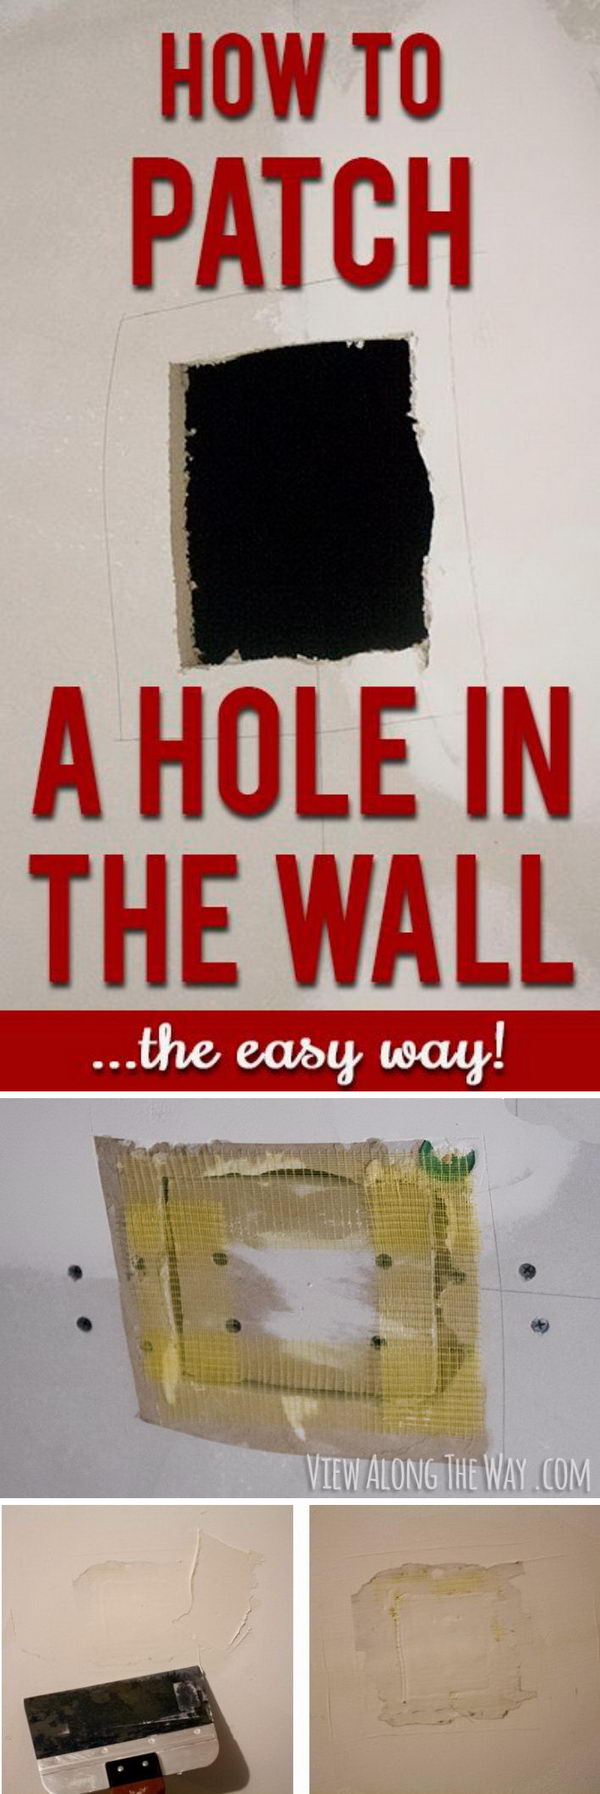
First, cut a rectangular shape around the hole to patch. This gives you an easy shape to use as a replacement template. Around the hole’s edge, tear off the protective paper. To affix the drywall, cut a small board just longer than the hole. Slide it inside the hole and screw it into place. Then screw your new drywall onto the board. Cover the seams with drywall tape, and cover with sheetrock mud. Wipe excess off, let it dry, sand, and repeat. via viewalongtheway.
Easy Instructions to Repair Drywall Patch

Start with a drywall patch kit. This kit includes a tub of 3M Patch plus primer, a self-adhesive patch, a putty knife, and a sanding pad. Remove debris in the hole you need to patch. Then apply the patch over the hole and cover with primer. Use the putty knife to spread the primer toward the outside edges, making it thinner near the edges. Allow it to dry and then sand. via thediyvillage.
How to Repair a Leaky Sink Faucet
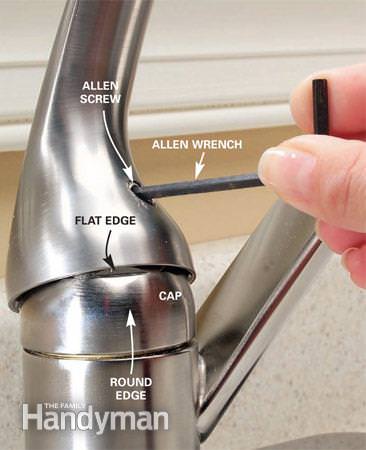
To remove a faucet’s handle, use an allen wrench to remove the screw. If it’s stuck, try removing the cap with the handle still in place. You can also try spraying the screw with penetrating oil or using a drill to drill out the screw. What’s most important is to separate the parts and salvage the individual pieces. You can purchase repair kits that include handles and balls, but this will save you money over purchasing a whole new faucet. via familyhandyman.
How to Repair Cracked Concete
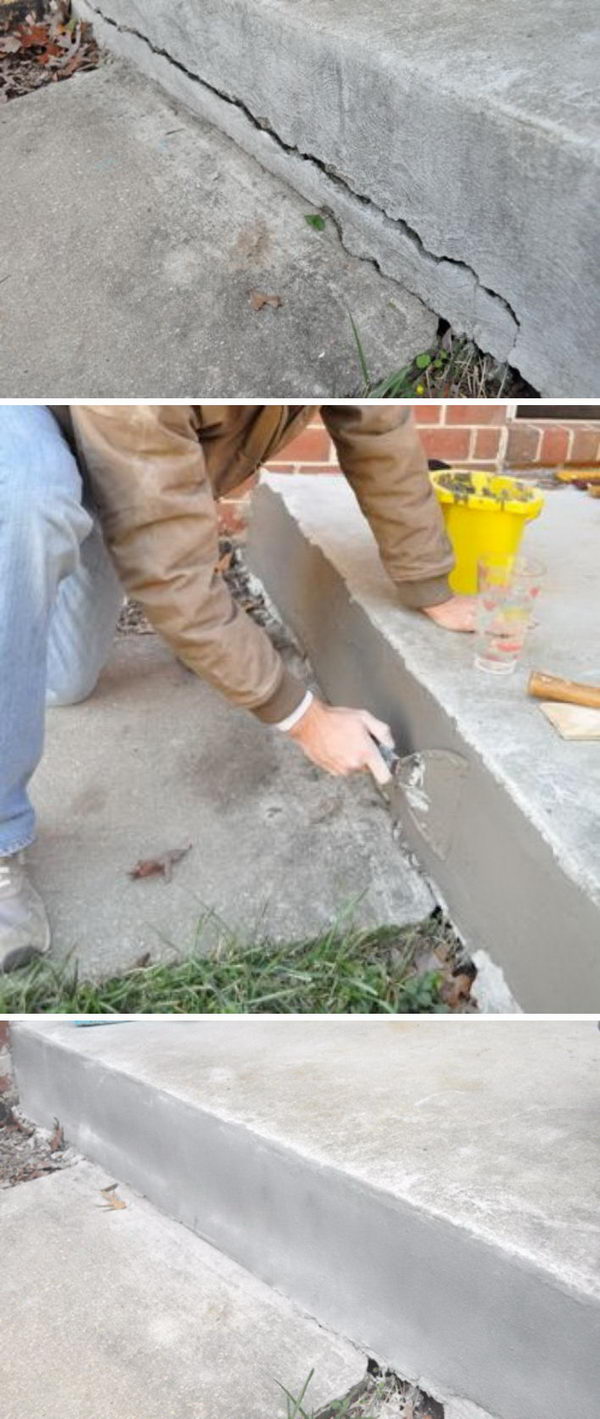
Clean the crack with a wire brush to remove any loose pieces. Next, mix your concrete/mortar mixture. Dampen the surface you’ll be repairing, and use a trowel to spread the mortar over the area. To hide the transitions, take some of the loose pieces of the old concrete and pulverize them. Sprinkle the dust over the transitions to blend the old with the new. Allow the concrete to cure, and smooth any rough edges with a wire brush. via oneprojectcloser.
Paint Your Bathtub and Save Your Money
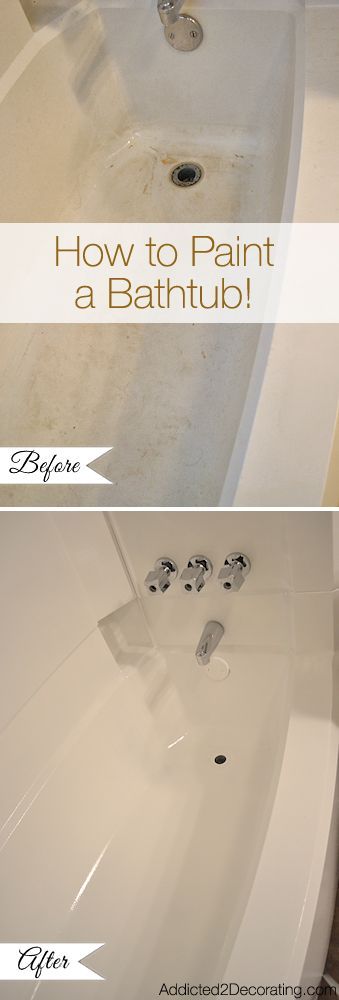
To paint your tub, first remove any adhesive non-slip pads and scrub the tub with an abrasive cleaner. Next, sand the tub with 400-600 grit wet sandpaper to remove residue and make the surface ready to paint. Mix your epoxy and paint two coats on the tub, waiting an hour between coats. Finish any seams by caulking. via addicted2decorating.
Repair Rotted Wood Without Replacing it
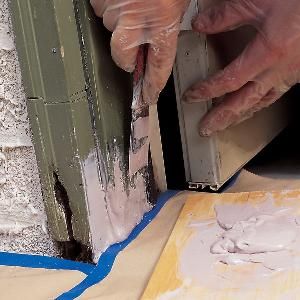
There’s a three step process to replace rotted wood. First, remove the rotted wood with a sharp tool. Next, use a wood hardener to strengthen the remaining wood fiber. Mix polyester wood filler and fill the open areas. If needed, you can sand, trim and repeat to ensure a smooth surface with no sagging. via familyhandyman.
Cover an Ugly Bathtub With Faux Stone
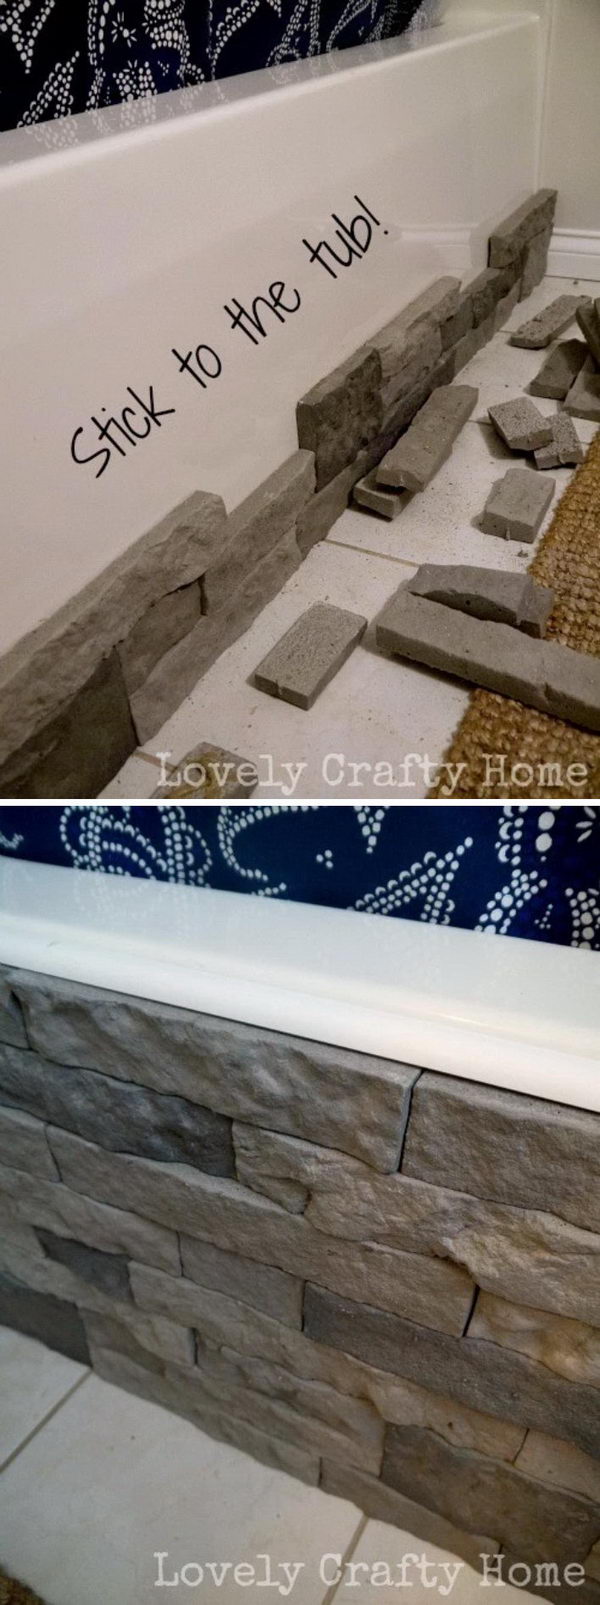
The key to this look is using Airstone, a manufactured stone. Simply use adhesive to place the stones on the tub. If you need to cut one, a hacksaw will do the trick. Finish the look with a border of quarter round and caulk and you have a custom look! via lovelycraftyhome.
Replace Black Moldy Caulk and Clean Your Tile Shower

The secret to clean caulk is taping off the areas first. Remove the old caulk using a utility knife. Then tape either side of each seam. Refill with caulk, smooth, and then remove the tape one strip at a time. Smooth the new caulk once the tape is removed, and allow it to cure. via tilecleaning.
Use a Lipstick to Help Solve Door Latch Problems Fast
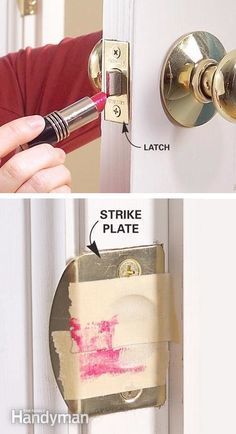
One of the hardest parts of fixing a door latch is making sure the lock and strike plate line up. For a quick fix, cover the strike plate with tape and the latch with lipstick. You’ll see where it hits so you know how to adjust for the perfect fit! via familyhandyman.
Use Crayon to Fill Nail Holes Quickly
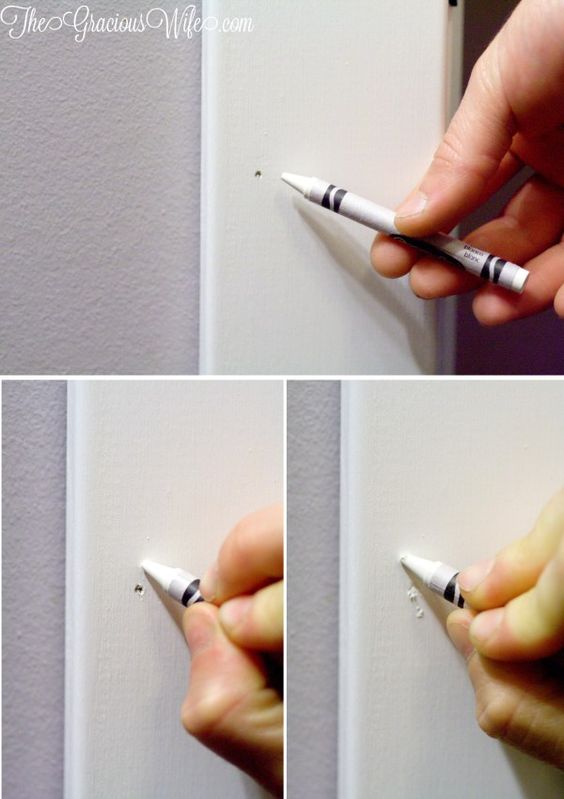
When you need to fill a nail hole, find a crayon that matches your wall color and “color” the hole, pressing gently to fill it with wax. For larger holes, soften the crayon slightly with a lighter to help it fill better. via thegraciouswife.
Hole in an air mattress? Fix it this way easily!
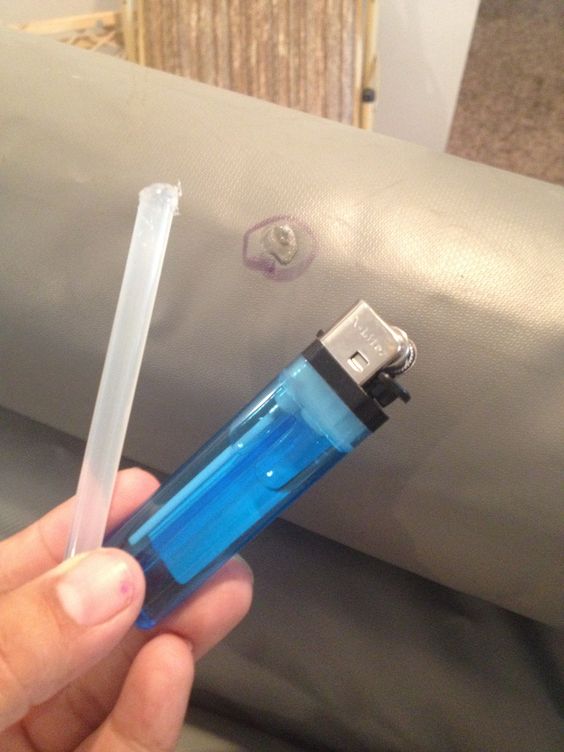
Rather than purchasing expensive patch kits, fix a hole in your air mattresses easily. Melt a glue stick with a lighter, and rub the melted part on the hole. The glue dries in seconds, and your air mattress is as good as new! via pinterest.
Use a Rubber Band to Unscrew Stripped Screws
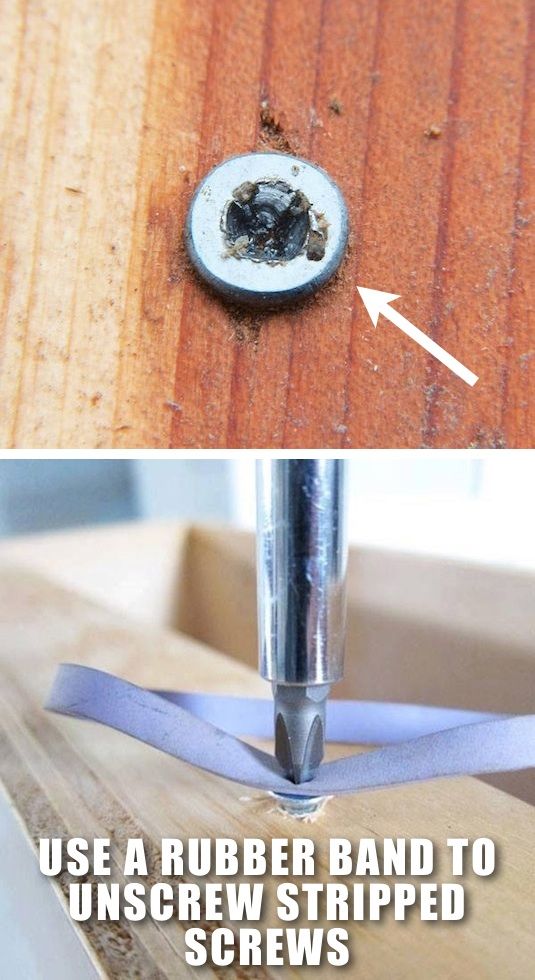
If you have a rubber band wide enough to cover the head of your stripped screw, use it for leverage. Place it over the screw and apply firm pressure with your screwdriver. Sometimes that’s all it takes to give you the leverage to loosen the screw! via todayifoundout.
Drip Tray for Muddy or Wet Shoes
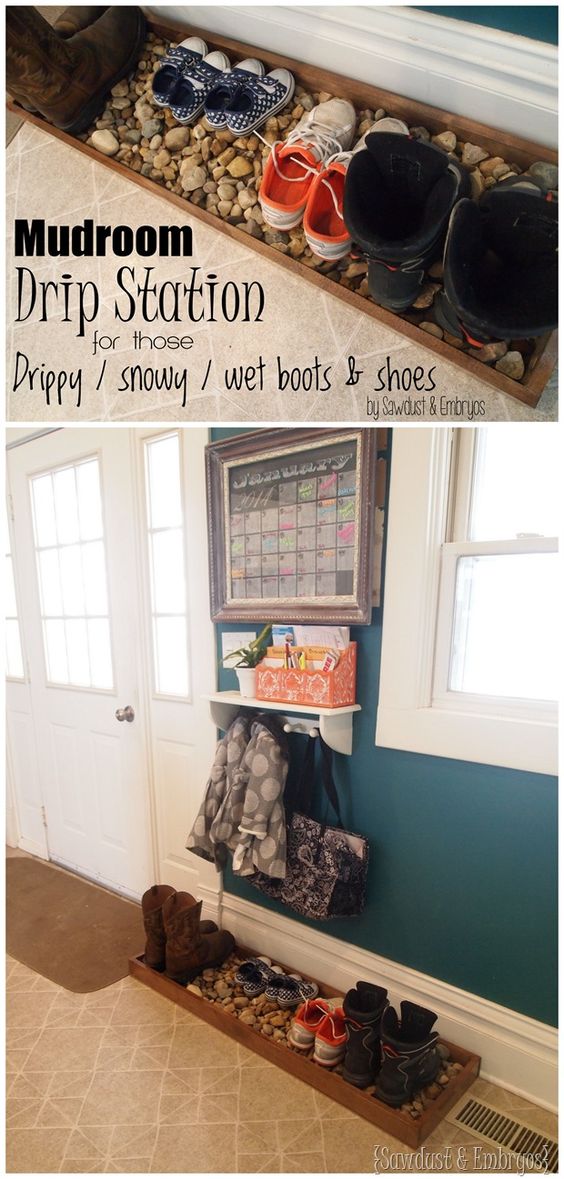
This is a great solution for keeping your floors mud-free. Simply build a frame and attach a piece of plexiglass to the bottom. Fill your new frame with river rocks and water and mud will stay in the tray. via realitydaydream.
Make Your Space Pretty and Keep Mosquitoes Out Using Lace Window Screens
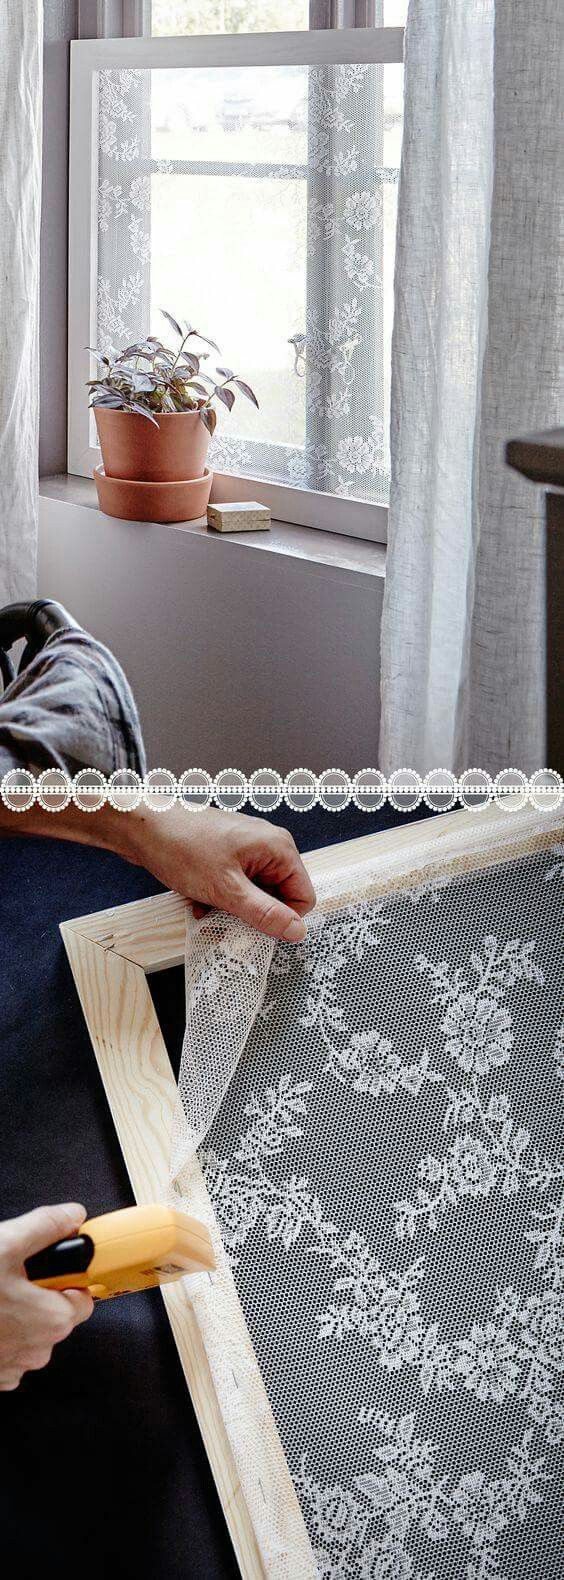
This is practical and pretty. Purchase or build a wooden frame for your window, and cut a length of lace to fit. Attach with staples and place in any window where you need a quick pick-me-up. via instagram.
Use an Iron and Paper Towel to Fix Dents in Furniture
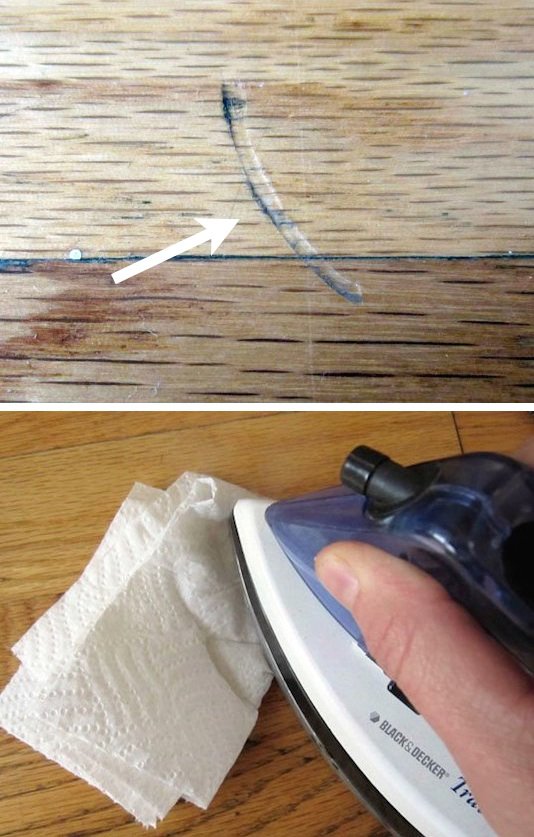
When wooden furniture has been dented, you can remove the dent using this technique. Be sure to test in an inconspicuous space first for any discoloration. Cover the dent with a moist paper towel, and slowly iron on high. The dent should raise and become unnoticeable. via apartmenttherapy.
Fixing a Stripped Hole with a Golf Tee
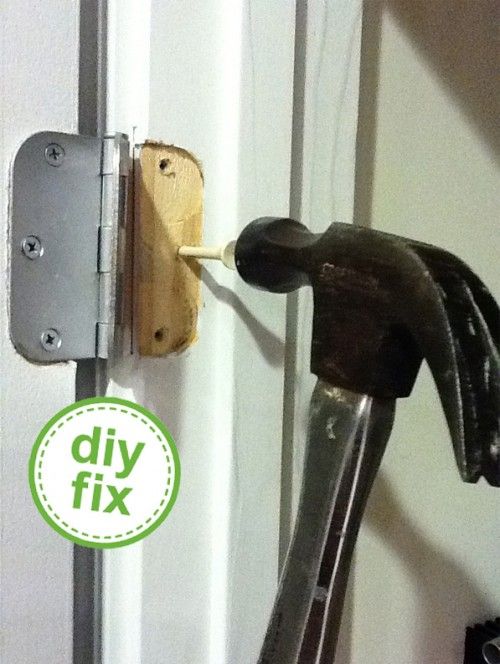
You can fix a stripped hole with four easy steps. First, fill the hole with wood glue. Next, hammer a golf tee into the hole. Use a box cutter to remove any exposed tee. Then drill a pilot hole and screw the new screw directly into the tee. via houzz.
DIY Decorative Air Conditioner Unit Cover
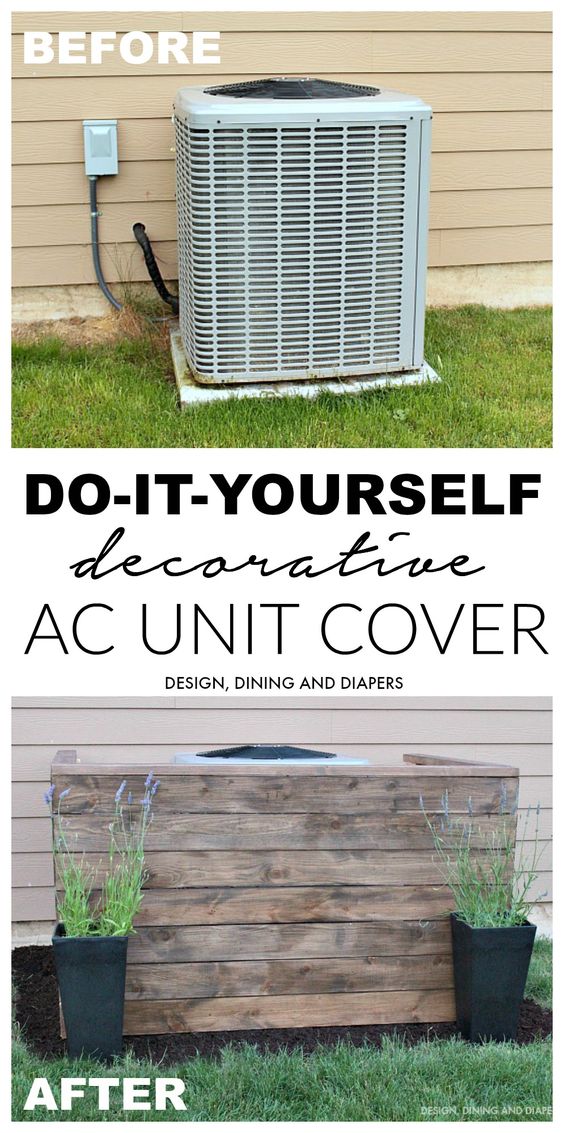
If you’re tired of looking at your air conditioner unit, build a small fence around it. Be sure to check your unit specifications regarding how much space you need for ventilation. Finish, stain, and add some simple landscaping to complete the look. via designdininganddiapers.
How to Repair a Leaky Shower or Tub Faucet

Before you begin, turn off the water. Then remove the screw attaching the cover of the faucet handle. Remove the handle, any collar, and the escutcheon that is along the wall. Remove and replace the stem, then reverse the steps above to rebuild the faucet. via prettyhandygirl.
Replace a Broken Floor Tile Easily
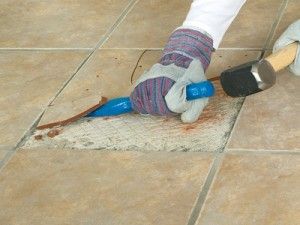
Remove the grout surrounding the broken tile. Then drill holes in the broken tile. This step will help break up the tile so it can be removed more easily. Chisel out the broken tile and any adhesive, and then affix the new tile. via sdflooringcreations.
How to Remove Baseboards without Damage

When doing repairs on your floors, you can save time and money by reusing baseboards. Use a utility knife to cut between the top of the baseboard and the wall. Use a putty knife and a crowbar to slowly remove the baseboards. Be sure to label each board so you can easily replace them in the same position when you’re finished! via craftingintherain.
How to Get Rid of Unwanted Wall Anchors
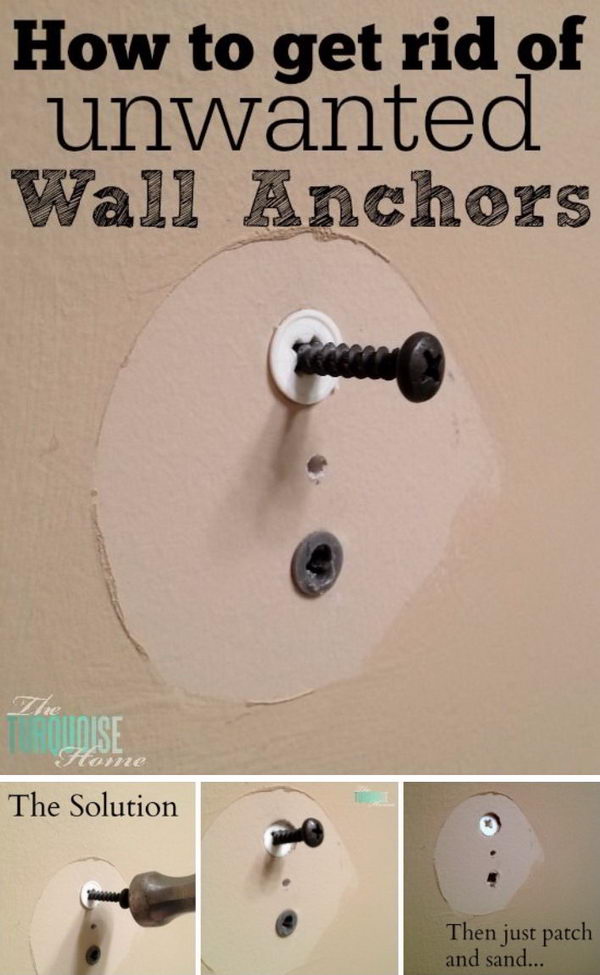
Partially screw a screw into the wall anchor. Once inserted, gently tap it with a hammer to push the anchor further into the wall. Once it’s no longer flush with the wall, you can patch it like a normal hole. via theturquoisehome.
Outlet Cover With Nightlight
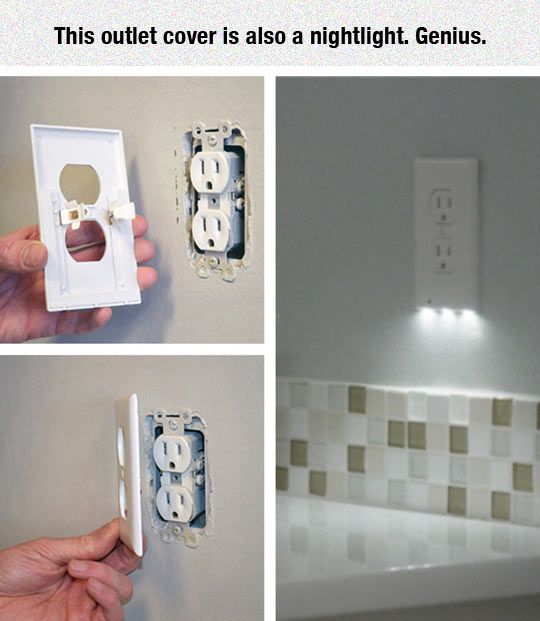
This is a great alternative to traditional nightlights. Once you purchase the SnapRays Guide Light, you can easily install it on any traditional outlet. There’s no special wiring needed, so it’s a fast fix. via treehugger.
Prevent and Fix the Problem of Downspout Runoff

Downspout runoff can cause flooding around your home’s foundation. This can be prevented and fixed with an NDS catch basin under the downspout to divert the water away from your foundation.
Easy Fix for Scratched Hardwood Floors

To fix scratches in hardwood floors, use Howard Restor-a-Finish. Choose a color similar to your floors. Pour a small pool over the scratches, and rub it in with a paper towel. Dry with another dry towel, and watch the scratches vanish! via thechroniclesofhome.
How to Fix Sagging Couch Cushions

When couch cushions can’t be removed, there’s a secret. On the underside, there’s a hidden zipper. To fluff, unzip and adjust the stuffing or add more. Your couch cushions will look like new! via thistlewoodfarms.
How to Remove Scratches from Leather

To remove scratches from leather, rub olive oil into the scratches using a circular motion. Once the oil’s absorbed, rub with a dry cloth to remove residue. The leather will be scratch-free and more lustrous too! via mash-upchic.
Painting Baseboards? Protect Your Carpets with Press’n Seal!

Traditional painting tarps are too thick to easily use around baseboards. Use Press’n Seal to provide a thin layer of protection over your carpet, and tuck the edge under the baseboards.
Repairing and Caulking Baseboards Like a Pro

Use a caulk scraper to remove old caulk, then tape on either side of your new caulk line. Apply caulk and smooth with your finger. Remove the tape while the caulk is still wet. via cravingsomecreativity.

Wonderful ideas! Thanks for sharing!
Wonderful information on things I didn’t know about. Keep them coming I really enjoyed reading on these repairs and will tell other about this site Awesome!!!!!!!!! Thanks Again! dragonfly
Good ideas I’m going to try most of it. Very useful infomation, Thanks
You should fill your tub with water before recalking. This accounts for the weight of a bath and will keep your seal longer without seperating.