
Great Caulking Tips & Tricks
Are you struggling to find caulking tips which can help you repair cracks and holes in your floors and walls? For long lasting results, you need to know how to perform caulking properly. Here are some great caulking tips that can make your caulking job much easier.
Advantages Of Different Types Of Caulks – In a Nutshell
Caulk can be described as a finishing material with excellent sealing properties. You can use it to seal cracks and gaps on the interior and exterior surfaces of your home. There are different types of caulking materials available and they include silicone, latex, acrylic latex, butyl rubber, oil-based asphalt, caulking chord and many more. Each material has its own unique features and advantages.
Silicone bonds well with a wide variety of materials like glass, ceramic, wood and metal and it is highly effective and durable as well. Latex is a good option for indoor use and acrylic latex can be used to match certain color schemes. It is equally good for both indoor and outdoor uses. Butyl rubber can be used to seal gaps and cracks up to 1/4 inches wide and you can purchase colored tints to mix with this caulk to go well with the existing decor. Oil-based asphalt is an ideal option for heavy-duty repair jobs and caulking chord is used to seal of small gaps that can be found around air conditioning units, doors and windows.
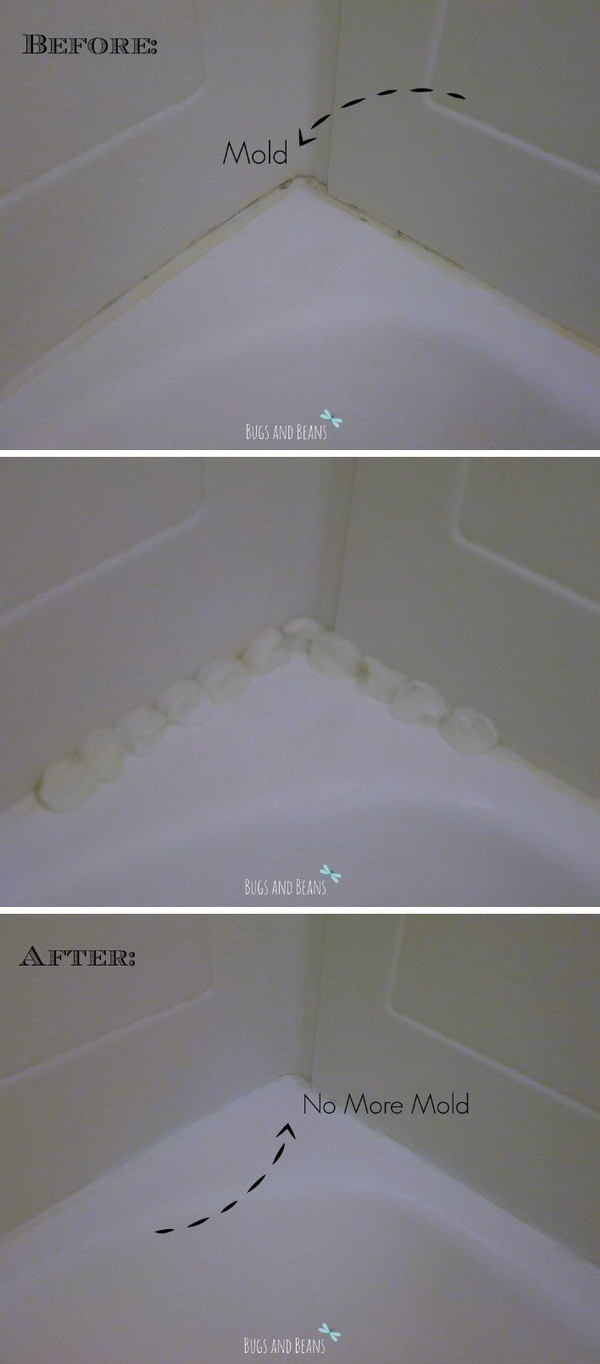
Soak Cotton Strips With Bleach To Get Rid Of Mold In Your Bathtub So You Don’t Need to Recaulk
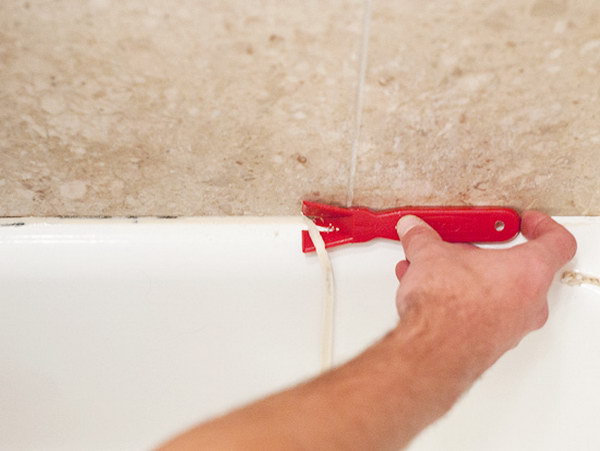
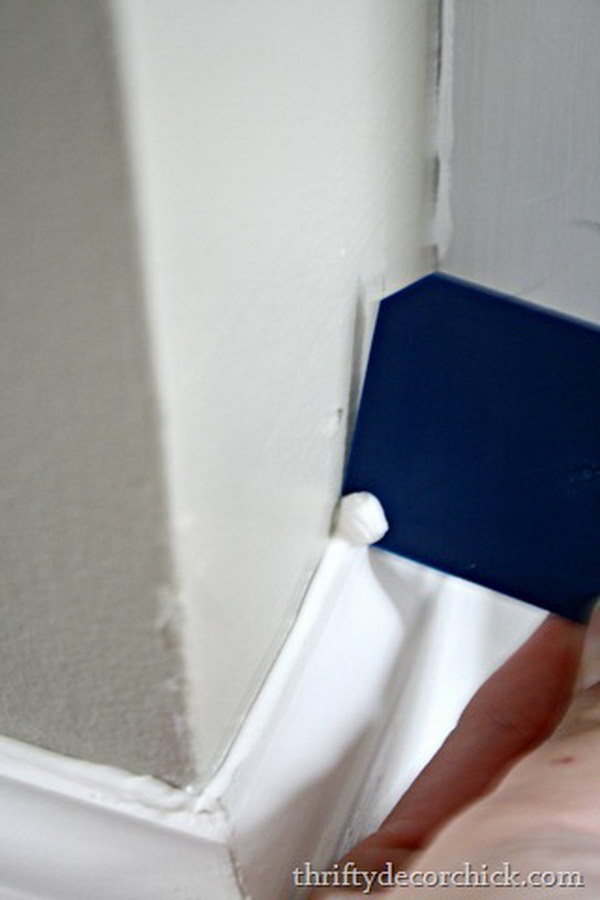
Remove Old Caulk Using The Right Method Of Approach
First of all, you have to the clean the caulking using a soap scum remover or apply caulk remover and wait for few hours to allow the caulk to soften. You can cut the caulking with a razor blade to identify the exact nature of caulk. If it is a silicone caulk, you can feel like a soft rubber when you cut it and latex shows more resistance to chipping or cutting because of its hardness. When it is softened, a chisel or putty knife should be used to remove the caulk and a heat gun can also be used to remove more stubborn caulk. The next step is to clean the surface with alcohol. The alcohol enlarges the molecules in the caulking and separates it from the previous setting. In order to eliminate the mildew and mold, a mixture of 1/3 cup of bleach and 1 gallon of water needs to be used and you must allow the surface to dry before applying the new caulk.
Watch The Weather And Caulk At The Right Time
If you are beginner, you should understand that the weather affects the efficiency of the caulk to properly adhere to the surface. It is always advisable to caulk in ideal weather conditions. What is the ideal temperature? The ideal weather condition is 40 Degree Fahrenheit and rising and, 90 Degree Fahrenheit and falling. If you can keep the surface temperature also in that range, you can enjoy long lasting results.
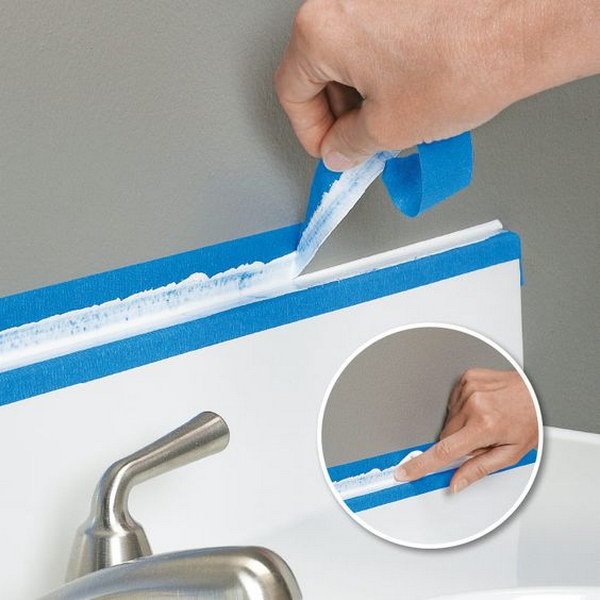
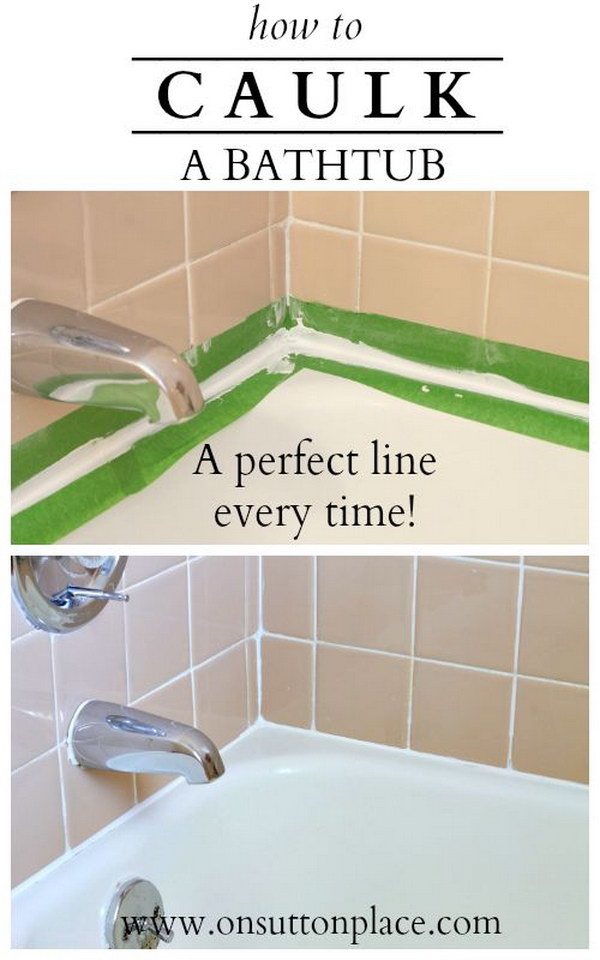
Learn how to caulk an ideally straight line (between the tub and flooring)
In order to perform this procedure, you need a blue painter’s tape, white caulk and damp rag. First off all, you have to tape off the areas carefully and then, some caulk should be squirted in the area between the tape. Now, the caulk needs to be smoothed using your fingertips and you must gently pull up the tape while the caulk is still wet. Such a method of approach helps you create an ideally beautiful caulk line around your bathroom tub.
Use tape to Make a Straight, Smooth Caulk Line
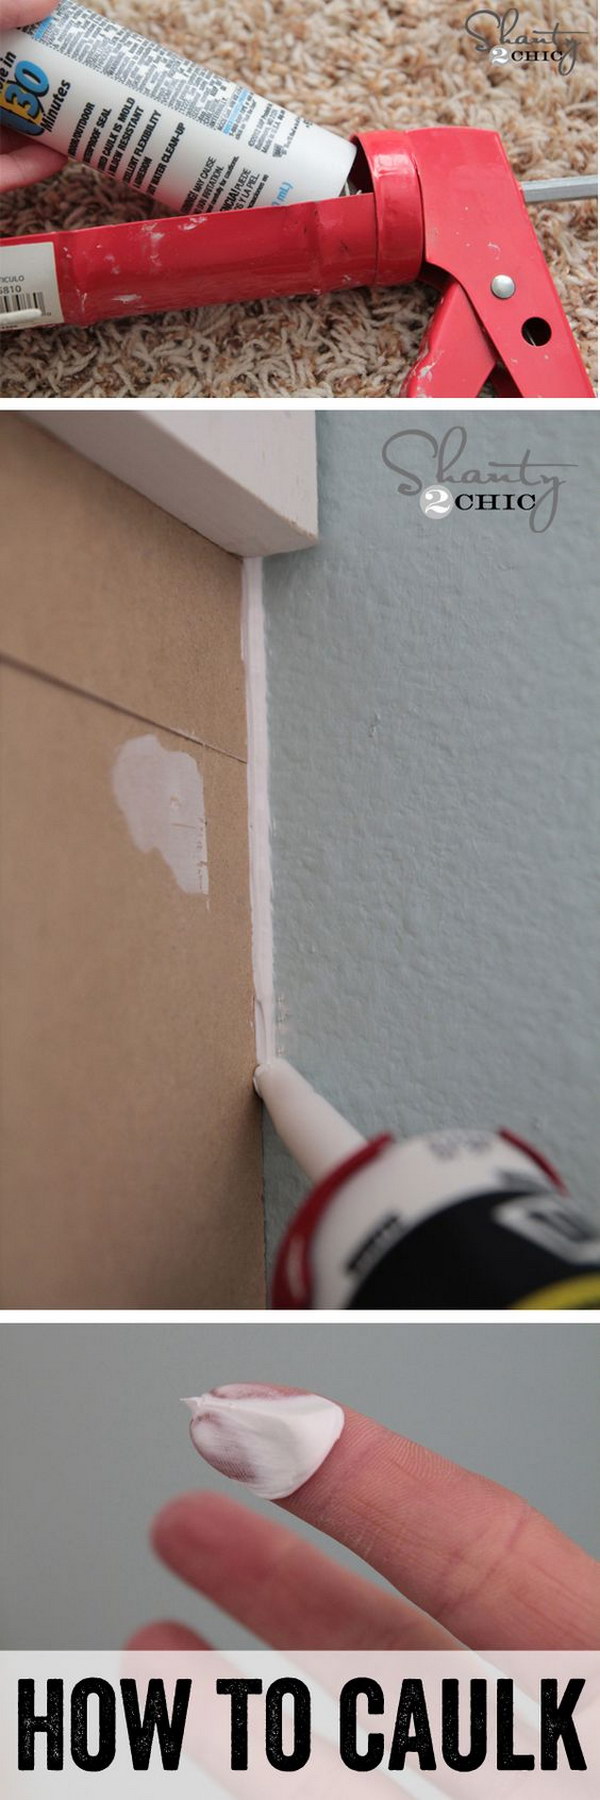
How To Use A Caulk Gun
How To Caulk A Bathtub
Use Rubber Wedge To Make Your Caulking Job Much Easier And Less Messy
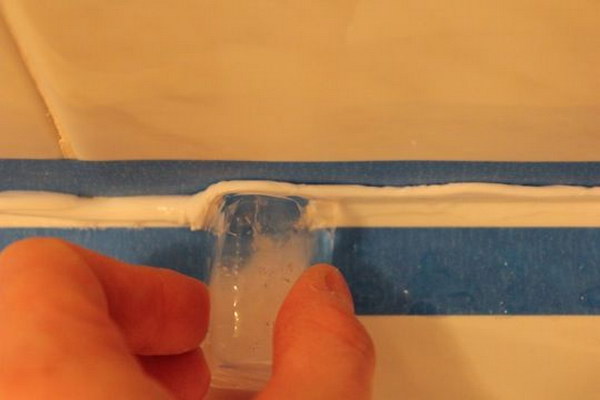
Smooth The Finished Line Of Caulk With An Ice Cube
Paint After Caulking The Cracks
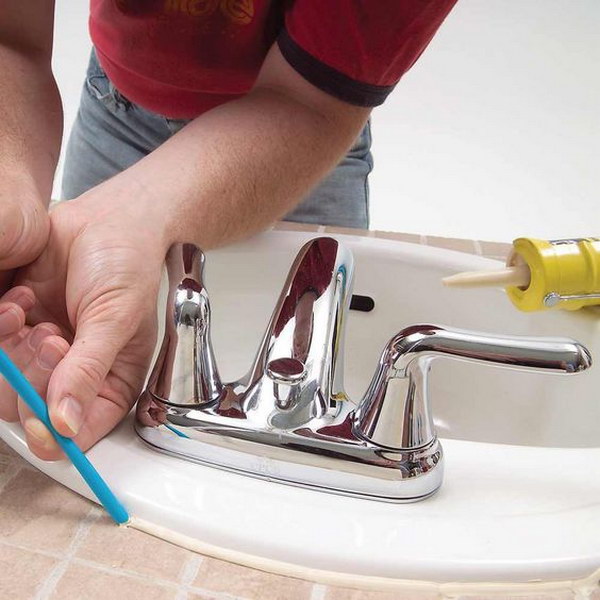
Caulk With a Straw
Prevent Cracks By Filling Your Bathtub With Water Before Caulking
Seal Cracks In Concrete With Durable Urethane Caulk
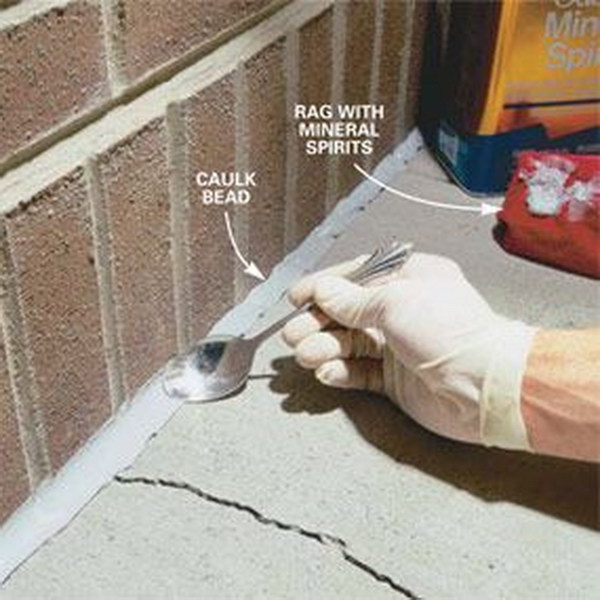
Learn The Art Of Caulking Concrete Cracks
Concrete often cracks over a period of time. These unwanted cracks make the surface look like dirty and worn out and, they also allow water to seep under the concrete to cause serious damage. First of all, you need to remove the debris and loose the concrete in the crack with the help of a screw driver. A wire brush should also be applied to make the cleaning process highly result oriented. Then, you can use a leaf blower or broom to clean out the crack and the next step is to fill the crack with urethane caulk. For wider cracks, you have to push foam cracker rod into the crack using a screwdriver and then, the crack can be filled with urethane caulk.
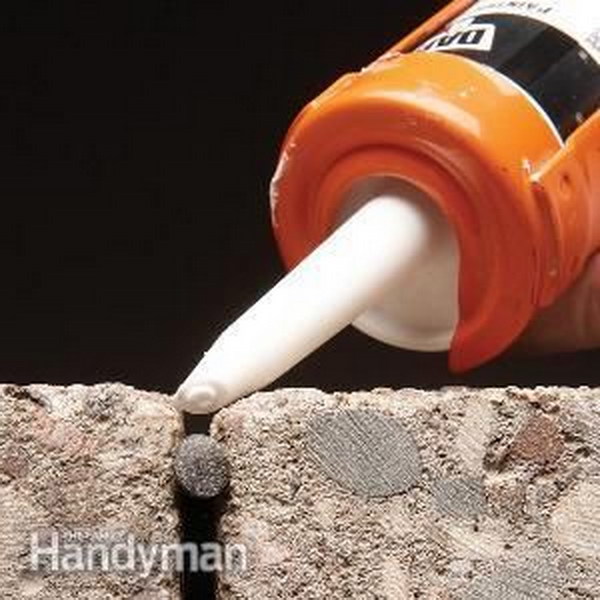
Fill Wide Cracks With Foam Backer Rod Before Caulking
Great tips. I suggest caulking joints AFTER priming; caulk doesn’t stick to raw wood very well, and it is harder to smooth.